NVIDIA TensorRT Model Conversion Guide
Complete implementation guide for converting ONNX models to TensorRT engines with FP16/INT8 optimization.
Use Case
Application: Accelerate deep learning inference on NVIDIA GPUs
Benefits:
- Performance improvement over CUDA
- Reduced latency for real-time inference
- Optimized memory usage
- Supports FP16 and INT8 quantization
Background Analysis
Why TensorRT?
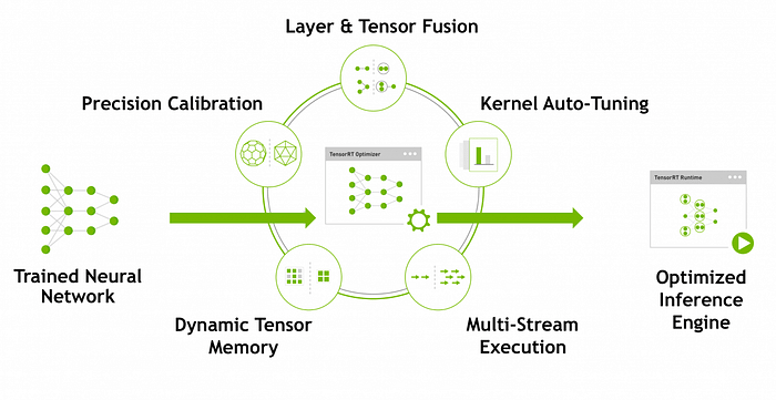
TensorRT is a high-performance deep learning inference optimizer and runtime that delivers maximum performance for deploying deep learning models.
Key Features:
- ✅ Automatic kernel optimization
- ✅ Layer fusion and precision calibration
- ✅ Dynamic tensor shaping
- ✅ Multi-GPU support
- ✅ Production-ready deployment
Supported Platforms
| Platform | Requirements |
|---|---|
| Hardware | NVIDIA GPU (Jetson, Tesla, GeForce, Jetson, etc.) |
| OS | Ubuntu 20.04/22.04, Windows 10/11 |
| Driver | Latest NVIDIA driver |
| CUDA | CUDA 12.5 or later |

Implementation Steps
Step 1: Hardware Verification
Prerequisites:
- NVIDIA GPU device
- Ubuntu OS (22.04 recommended)
- Latest NVIDIA driver installed
Verification Commands:
# Check GPU presence
nvidia-smi

# Check CUDA version
nvcc --version
Hands-on Example:
- Hardware: ASR-A701
- Platform: NVIDIA Jetson Orin
Step 2: Install NVIDIA Driver
If you are use Jetson platform, you can skip this step.
Preparation:
- Download the latest NVIDIA driver from NVIDIA Website
- Blacklist Nouveau driver
Installation:
# Blacklist Nouveau driver
sudo bash -c "echo blacklist nouveau > /etc/modprobe.d/blacklist-nvidia-nouveau.conf"
sudo bash -c "echo options nouveau modeset=0 >> /etc/modprobe.d/blacklist-nvidia-nouveau.conf"
sudo update-initramfs -u

# Reboot system
sudo reboot

# Install NVIDIA driver
sudo chmod +x *.run
sudo ./*.run
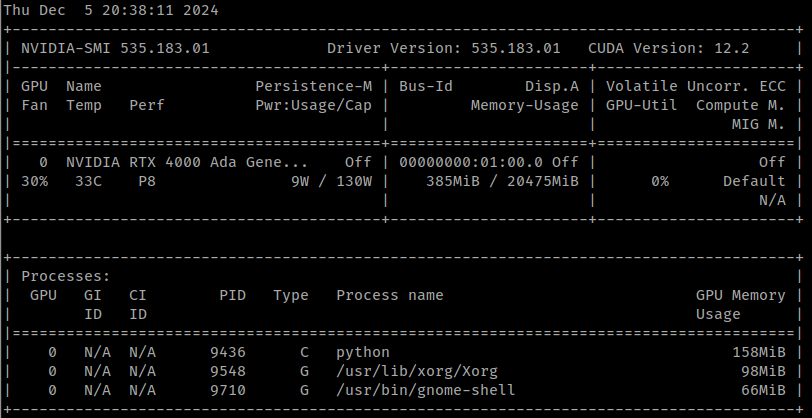
Verification:
# Check driver installation
nvidia-smi

Step 3: Install CUDA Toolkit
If you are use Jetson platform, you can skip this step.
Installation:
# Add CUDA repository
wget https://developer.download.nvidia.com/compute/cuda/repos/ubuntu2204/x86_64/cuda-keyring_1.1-1_all.deb
sudo dpkg -i cuda-keyring_1.1_all.deb
sudo apt update

# Install CUDA Toolkit 12.6
sudo apt install cuda-toolkit-12-6
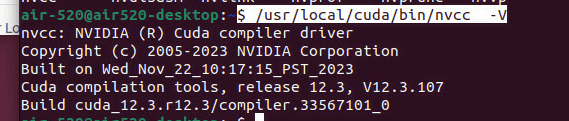
Verification:
# Check CUDA installation
/usr/local/cuda/bin/nvcc -V
Step 4: Install TensorRT
If you are use Jetson platform, you can skip this step.
Repository Setup:
# Add NVIDIA repository key
sudo apt-key adv --fetch-keys https://developer.download.nvidia.com/compute/cuda/repos/ubuntu2204/x86_64/3bf863cc.pub

# Add repository
sudo add-apt-repository "deb https://developer.download.nvidia.com/compute/cuda/repos/ubuntu2204/x86_64/ /"

# Update package lists
sudo apt-get update
Install TensorRT Packages:
sudo apt-get install \
  libnvinfer-dev=10.3.0.26-1+cuda12.5 \
  libnvinfer-dispatch-dev=10.3.0.26-1+cuda12.5 \
  libnvinfer-dispatch10=10.3.0.26-1+cuda12.5 \
  libnvinfer-headers-dev=10.3.0.26-1+cuda12.5 \
  libnvinfer-headers-plugin-dev=10.3.0.26-1+cuda12.5 \
  libnvinfer-lean-dev=10.3.0.26-1+cuda12.5 \
  libnvinfer-lean10=10.3.0.26-1+cuda12.5 \
  libnvinfer-plugin-dev=10.3.0.26-1+cuda12.5 \
  libnvinfer-plugin10=10.3.0.26-1+cuda12.5 \
  libnvinfer-vc-plugin-dev=10.3.0.26-1+cuda12.5 \
  libnvinfer-vc-plugin10=10.3.0.26-1+cuda12.5 \
  libnvinfer10=10.3.0.26-1+cuda12.5 \
  libnvonnxparsers-dev=10.3.0.26-1+cuda12.5 \
  libnvonnxparsers10=10.3.0.26-1+cuda12.5 \
  tensorrt-dev=10.3.0.26-1+cuda12.5 \
  libnvinfer-samples=10.3.0.26-1+cuda12.5 \
  libnvinfer-bin=10.3.0.26-1+cuda12.5 \
  libcudnn9-cuda-12=9.3.0.75-1 \
  libcudnn9-dev-cuda-12=9.3.0.75-1
Pin TensorRT Packages:
sudo apt-mark hold \
  libnvinfer* \
  libnvparsers* \
  libnvonnxparsers* \
  libcudnn9* \
  python3-libnvinfer* \
  uff-converter-tf* \
  onnx-graphsurgeon* \
  graphsurgeon-tf* \
  tensorrt*
Verification:
# Check TensorRT installation
/usr/src/tensorrt/bin/trtexec --help

# Verify installed version
dpkg -l | grep TensorRT

Step 5: Convert ONNX Model to TensorRT Engine
Model Preparation:
- Convert your neural network to ONNX format
- Ensure ONNX model is compatible with TensorRT
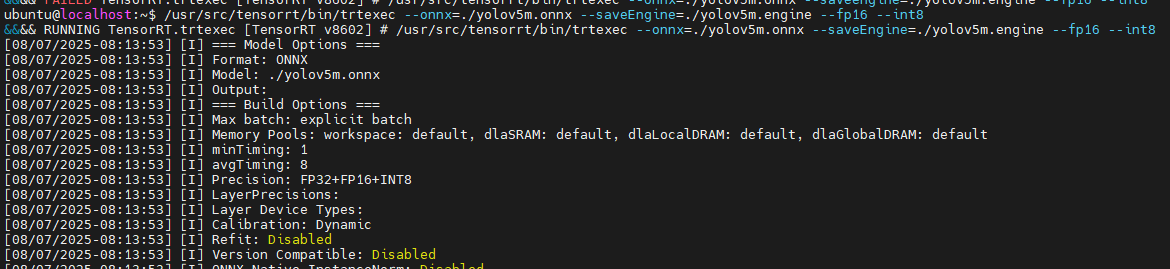
Conversion Command:
# Convert ONNX model to TensorRT engine (FP16 + INT8)
# Jetson please use /usr/src/tensorrt/bin/trtexec
$ trtexec --onnx=your_model.onnx \
          --saveEngine=model_int8.engine \
          --int8 --fp16
Conversion Options:
--onnx=<path>: Input ONNX model file--saveEngine=<path>: Output TensorRT engine file--int8: Enable INT8 quantization (requires calibration)--fp16: Enable FP16 precision
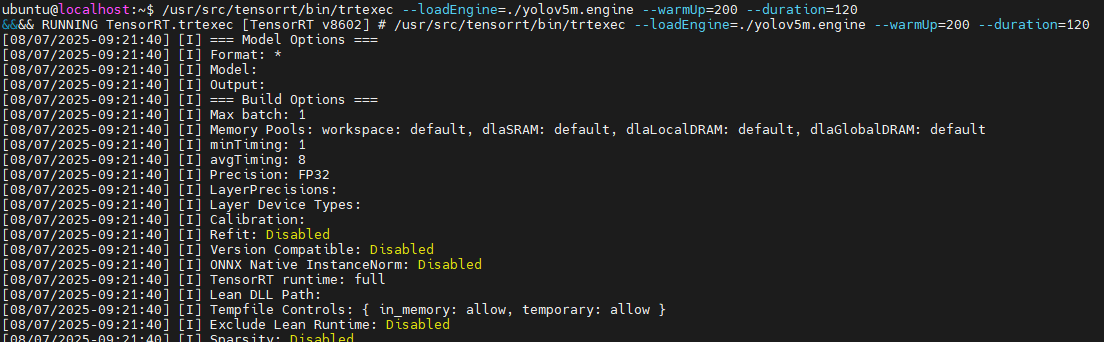
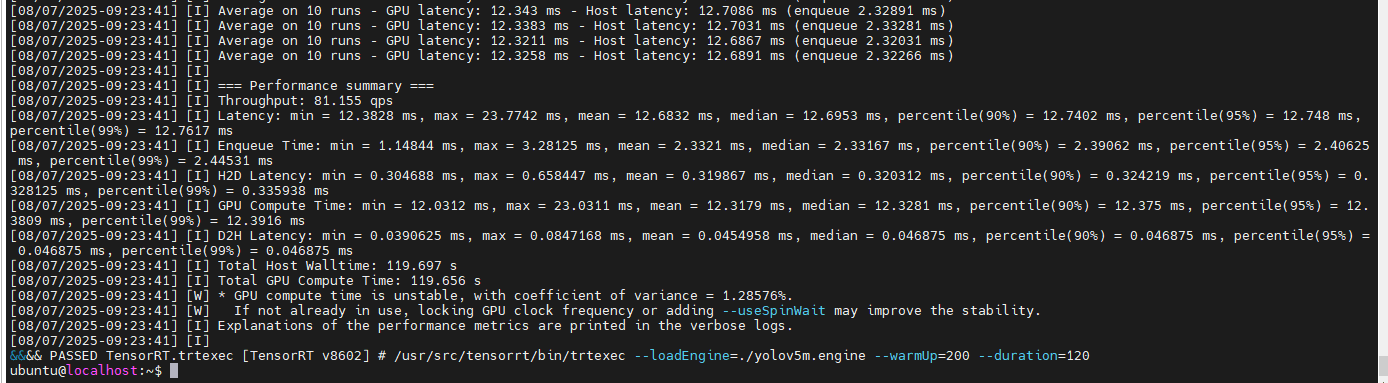
Step 6: Run TensorRT Engine
Execution:
# Load and run the TensorRT engine
# Jetson please use /usr/src/tensorrt/bin/trtexec
$ trtexec --loadEngine=model_int8.engine \
          --warmUp=200 \
          --duration=120 \
          --device=0
Performance Metrics:
- WarmUp: 200 iterations to stabilize
- Duration: 120 seconds measurement period
- Device: GPU device index (0 for single GPU)
Quick Start Guide
Complete Workflow
# 1. Verify installation
nvidia-smi
nvcc --version

# 2. Convert model
trtexec --onnx=model.onnx --saveEngine=model.engine --fp16

# 3. Run inference
trtexec --loadEngine=model.engine --duration=120
Common Use Cases
| Scenario | Command |
|---|---|
| FP16 Only | trtexec --onnx=model.onnx --saveEngine=model.engine --fp16 |
| INT8 Only | trtexec --onnx=model.onnx --saveEngine=model.engine --int8 |
| Mixed Precision | trtexec --onnx=model.onnx --saveEngine=model.engine --int8 --fp16 |
| Profile GPU | trtexec --onnx=model.onnx --profilingVerbosity=detailed --profile=profile.txt |
References
Additional Resources
Optimization Tips
- Use FP16 for most models - 2× speedup with minimal accuracy loss
- Enable INT8 for quantizable models - Additional 2× speedup
- Profile your models - Use
--profilingVerbosity=detailedto identify bottlenecks - Batch size optimization - Adjust based on your use case and latency requirements
Troubleshooting
Common Issues:
- Installation failed: Check NVIDIA driver version compatibility
- Engine conversion failed: Verify ONNX model format and opset version
- Performance issues: Ensure GPU is not throttled and cooling is adequate